The Ultimate User-Friendly Office 365 Post-Migration Checklist
Youve migrated to Office 365 You should be good to go right Not quiteOnce youve migrated your current email system to Office 365 there are st...

You’ve migrated to Office 365. You should be good to go, right? Not quite.
Once you’ve migrated your current email system to Office 365, there are still several steps required to set up individual accounts so employees can resume business as usual.
That’s why we created the ultimate, user-friendly Office 365 post-migration checklist to empower your team to customize their account preferences and start using Office 365.
Office 356 Post-Migration Checklist
Here’s how to set up individual account preferences including plugins, Outlook rules, calendar sharing and permissions after an Office 365 migration.
Make Sure All Your Folders and Content Are Present
Double check the Office 365 migration has completed populating folders to your local Outlook profile. Open up each folder — it should say “All Folders Up To Date” or “This Folder Is Up To Date.” (You can see the Folder status in the bottom right Outlook screen.)
Re-Install Outlook Plugins and Email Accounts
If you use any Outlook plugins or personal emails, you’ll have to reconnect them. You’ll need the username and password for each of the accounts.
Set Up Personal Rules in Outlook
Make sure you create Outlook rules to manage your inbox. We recommend using the Outlook Web Client to create all Outlook rules to ensure rules will be consistent across all devices you use to access your email (you can connect up to five devices to your account).
Check Archiving & Data Retention
Right-click on a folder. You should see Archive options listed there.
Check Calendar Color Schemes
Your custom calendar colors don’t always migrate. You need to go in and set up the colors again.
Add Resources to Your Calendar Appointments
Office 365 lets you add rooms or equipment to meetings. Select “Meeting Appointment” and choose from the list of available options to add them to appointments.
Add Your Email Signature
Email signatures don’t always migrate. Your IT administrator may send you a new one, or you can create a new one in Outlook.
Sharing Your Calendar and Folders
Right-click, and select “Share” on your calendar. Then select the level you’d like. You can also assign changing permissions. (See below for detailed instructions on how to set up and assign calendar permissions.)
(Optional) Connect to Your SharePoint Team Site
You can also connect to your SharePoint team site. Go to the site and select a document library. Select the library tab and click on the “Connect to Office” icon. 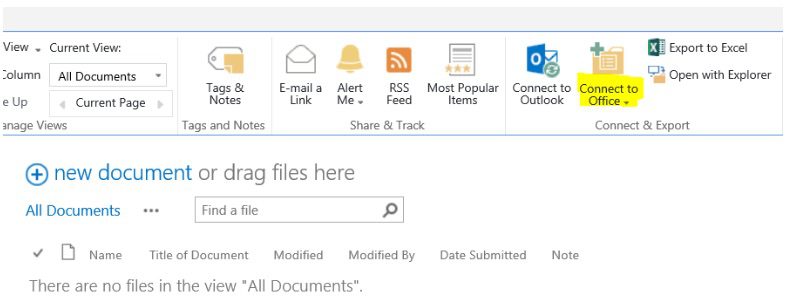
Add Contacts to Skype for Business (Microsoft Teams)
You’ll need to add your contacts into Skype for Business. Enter their email address in the search bar. Right-click the name and select “Add to Contacts List.” 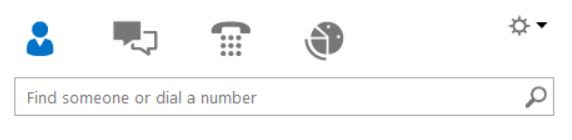
Change Your Password
You may receive a new email password or login credentials from your IT staff. When you log in for the first time, don’t forget to select the box “Remember My Password” or you’ll be asked to log your credentials every time.
Import your Local Archives
This is a time-consuming task and needs to be scheduled with your IT staff. You may want to use another computer while importing the data.
Add Your Contacts to Address Book
Your Address Book contains all company contacts who have Office 365 email addresses. When you create a new email list, this is the default list Outlook will search to autocomplete the match for you. Here’s how to add your contacts. Open your Contact folder.  Select the Contacts Properties for each Contact folder you’d like to add to the search bar. Select the box “Show this folder.”
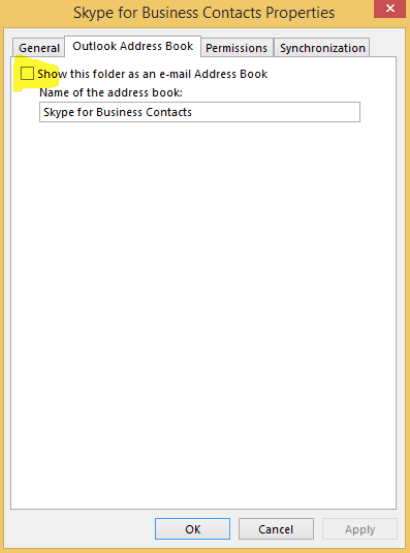
How to Set Up and Share Office 365 Outlook Calendar Permissions
You’ll also need to go through and set up your Outlook calendar sharing and permissions.
Changing Calendar Permissions
Calendar permissions allow people to view and edit your calendar but restrict them from sending meeting requests on your behalf. Here’s how to change calendar permissions in Outlook 2013 (Outlook 2010 - 2016 are also very similar.)
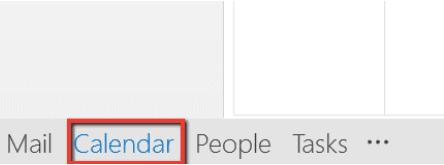
- Open Outlook and select the “Calendar” on the bottom left corner.
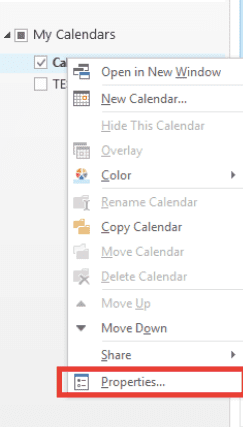
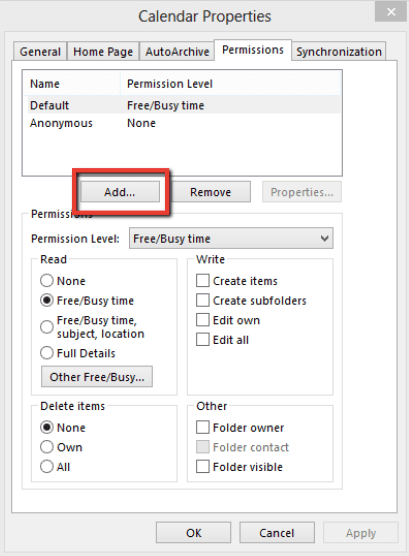
- Under “My Calendars” on the left pane, find the calendar you want to share. Right-click and select “Properties.”
- Select the “Permissions” tab and click “Add.”
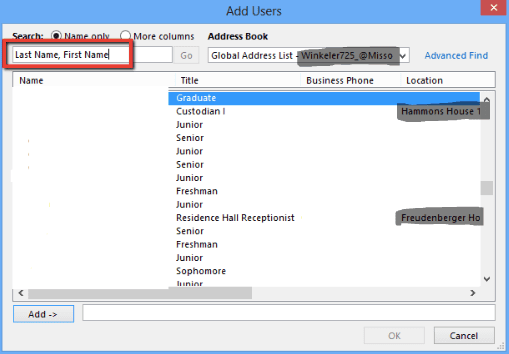
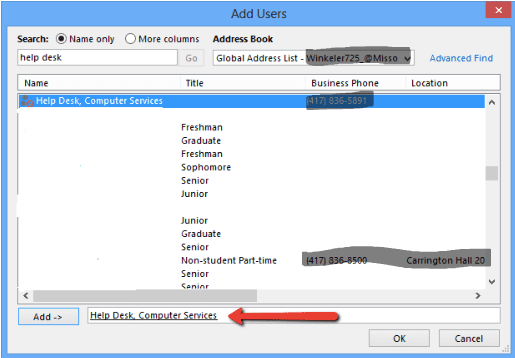
- In the Add Users dialog box, type the username you want to add in this format: “Last Name, First Name.”
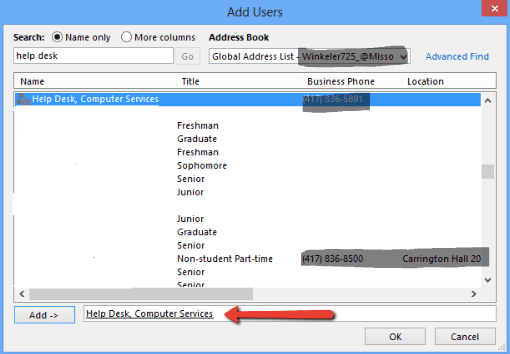
- Double click the contact, and it will appear in the “Add” field at the bottom and select “OK.”
To manage each user permission:
- Use the drop-down list under Permission Level to select the level of access you want them to have.
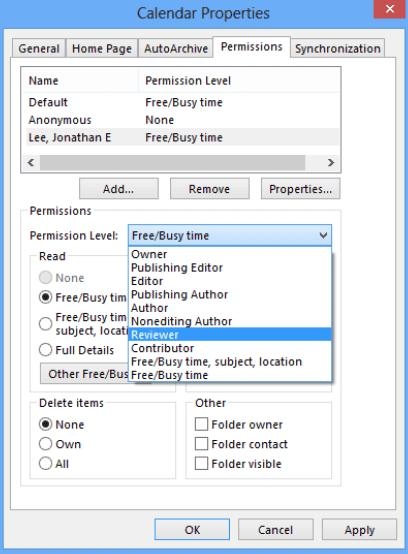
- Selecting the Permission level automatically updates the permissions to “Read,” “Write,” “Delete Items” and “Other.” To update the fields yourself, select “Custom” and use the checkboxes to select the permission levels. You can also remove users from this screen.
- Select “OK” to save the settings. Users can now view and edit your calendar once they open it in Outlook.
See how to open a shared calendar here.
Assigning a Delegate
Assigning delegates allows other users to view, edit, send and respond to meeting requests on your behalf.
- Click on “File” in the upper left-hand corner. You should see the “Info” view with the Account Information.
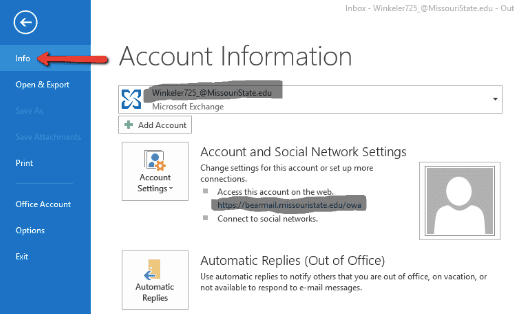
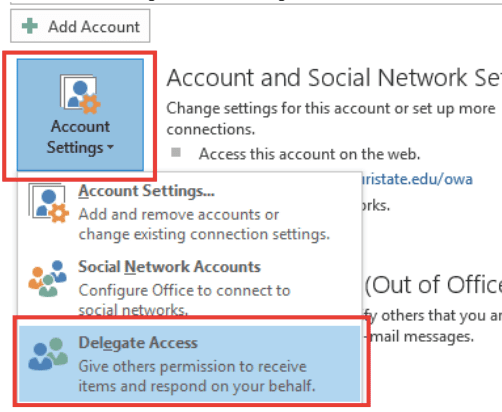
- Select “Account Settings” and choose “Delegate Access.”
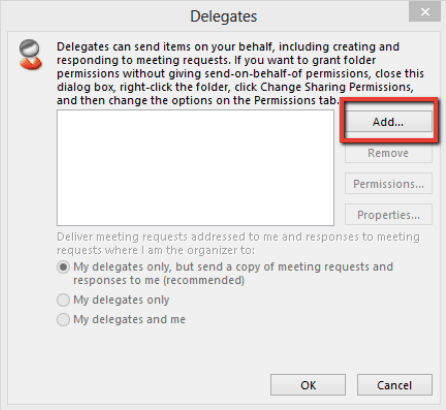
- Select “Add.”
- In the Add Users dialog box that appears, type the name of the user you want to add in this format: “Last Name, First Name.”
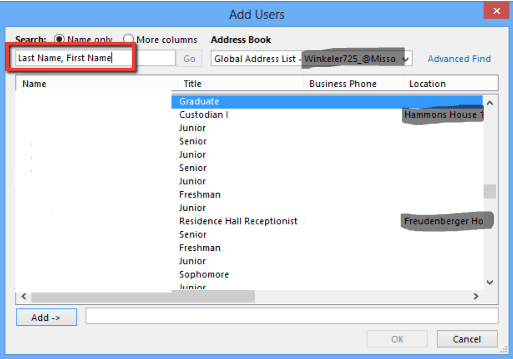
- Select the contact you want to grant access to and click “Add.”
- Select “OK.”
Managing Delegate Permissions
- In the “Delegate Permissions” box that appears, select the permissions you want.
- Reviewer: Can read items.
- Author: Can read and create items.
- Editor: Can read, create and modify items.
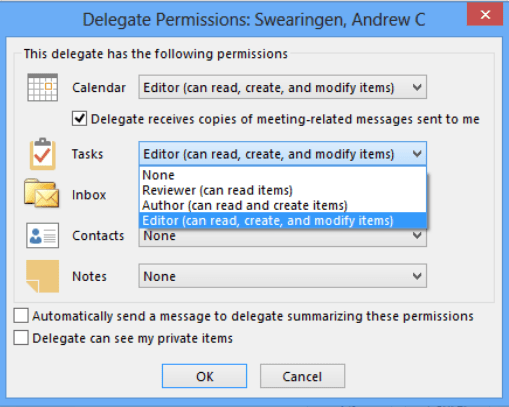
- Select “OK” to save your selections.
Need More Help With Office 365?
There are many steps to take after an Office 365 migration is complete. At Agile IT, we’ve migrated over one million mailboxes to the cloud. We know the support it takes before, during and after a migration. Plus, we can help you continue to get the most out of your investment with our cloud managed services. Schedule a call today to get more out of your technology investments today.