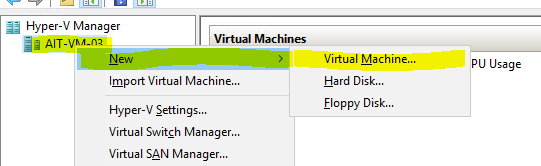
Creating a Hyper-V Template
Creating a HyperV template to quickly deploy new VMs can save time on spin up and updating You can set up hyperV templates preinstalled with appli...

Creating a Hyper-V template to quickly deploy new VMs can save time on spin up and updating. You can set up hyper-V templates pre-installed with applications and Windows features just as a WDS or PXE image would provide a consistent configuration for every deployment.
In this blog, I’ll be showing you how to manually create a new VM in Hyper-V, prepare the VM after imaging and then export/import as a template on Hyper-V 2016 Preview, with a Server 2012 R2 DataCenter VM.
First, we’ll create our VM template:
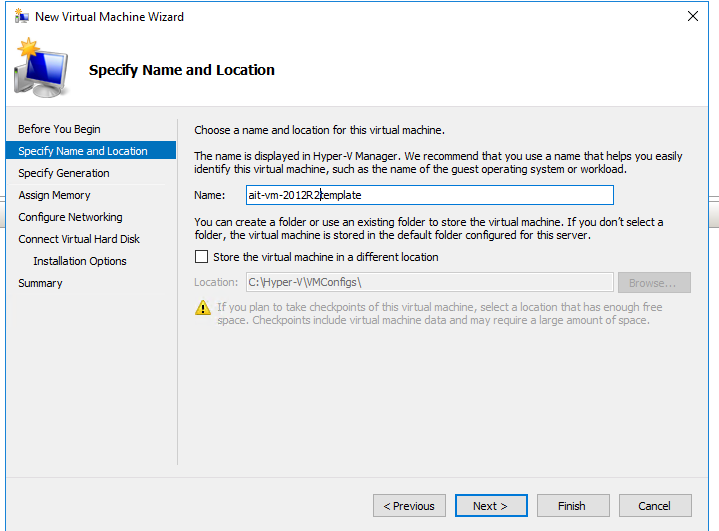
Give the VM a recognizable name. When creating the VM and specifying a name and location, leaving the “Store the virtual machine in a different location” box unchecked will store the VM configuration and VHD files in the configured location in the “Hyper-V Server settings.” To select a different location, check this box and you will be prompted to specify locations for files in the next screens.
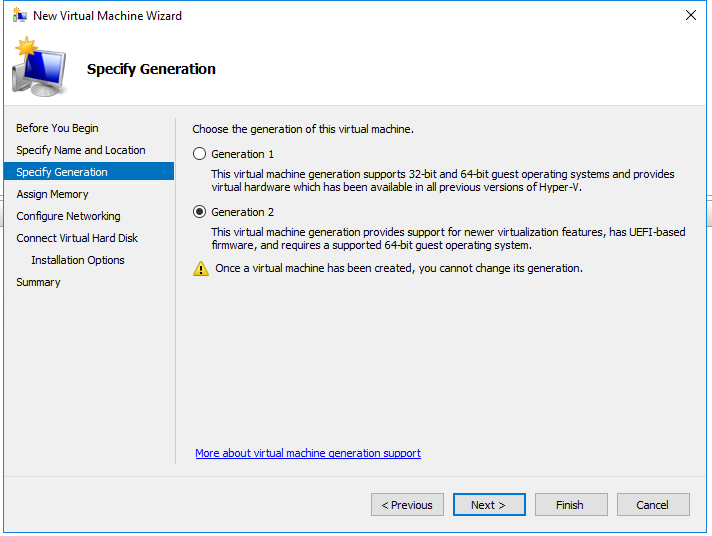
Select your preferred generation. This decision has no impact on the process, but keep in mind this cannot be changed after deployment. Additionally, if you plan to import this virtual machine into Azure, at the time of this blog, only Generation 1 VMs are compatible with Azure services. A common scenario for choosing Generation 2 virtual machines would be if you plan to migrate VMs between other Server 2012 R2 (or Windows 8.1/10 Pro or Enterprise) Hyper-V servers.
Additional information about the differences between generations is located here:

Assign your memory. All VMs deployed with this template will start with this amount. It can be changed after deployment.

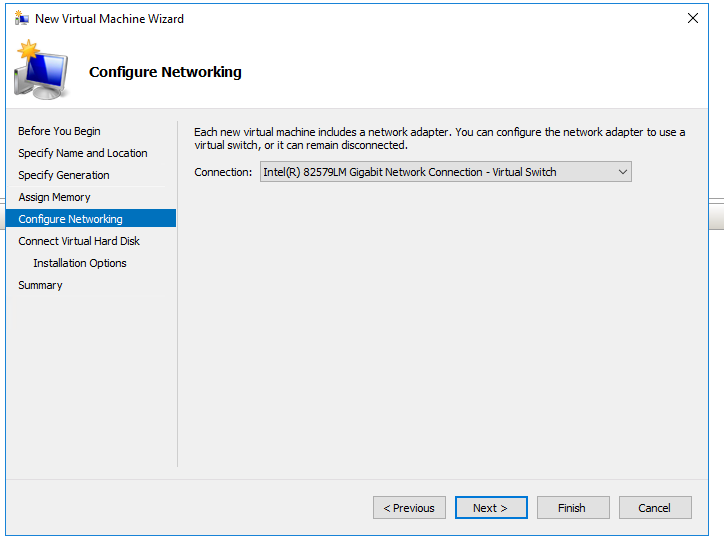
Select your network connection. Again this can be changed after deployment or additional NICs are added to the VM.
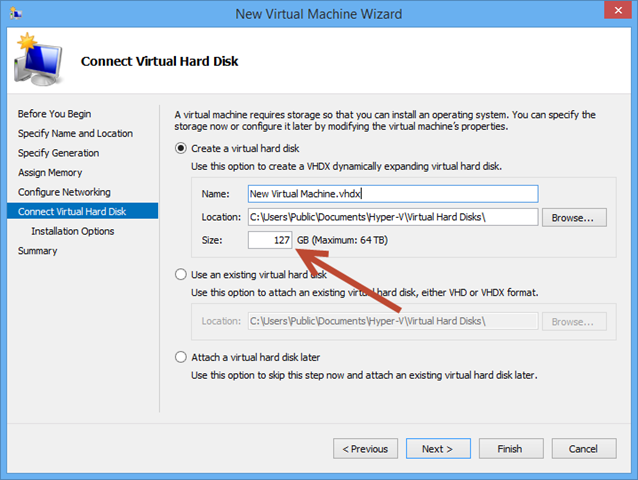
And finally specify your disk size. I find 80GB to be suitable for the base OS and some smaller apps. For any virtual machines that will be running applications such as SQL, SCCM, SCOM, etc., I tend to add a second data disk post deployment of the template. Note that disk size for the system disk and any data disks can be modified after deployment.
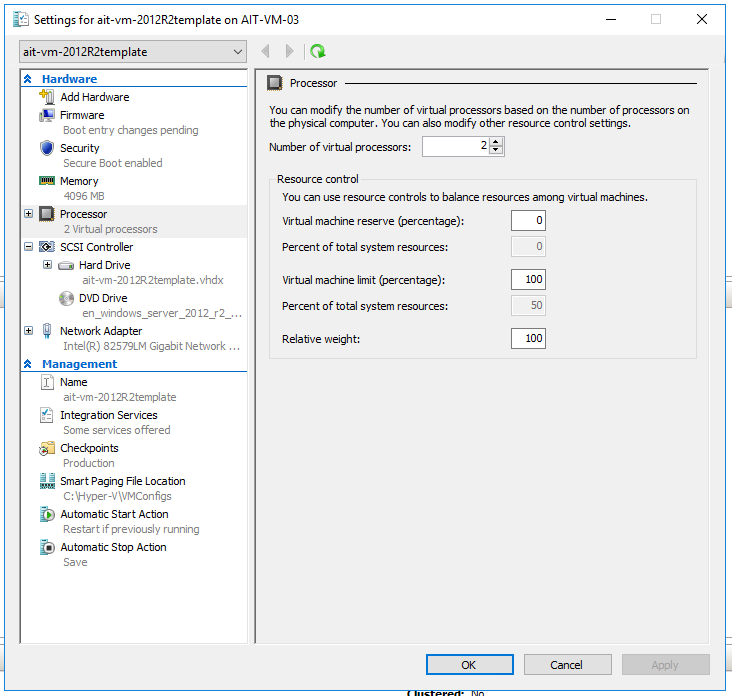
Post setup of the VM, don’t forget to adjust the amount of virtual processors to increase performance during the OS install process. At least 2 processors should be used for the base install and updates to reduce the amount of time the process takes. This processor count can be adjusted up or down after OS install.
Now proceed with the install of the OS as you would any other server. Once setup is completed, perform any updates you wish to be included in the template. Do NOT domain join the server or activate it. This data will be wiped during the sysprep action we’ll be taking next. Do not worry about changing the name; that will also be reset. Some options you can change that carry over when deployed from the template include:
- Remote Desktop Settings
- IE Enhanced Security
- Time zone
- Local Users and Groups
- Update Settings (overwritten by GPO if update GPOs exist)
- Install of common freeware apps like Notepad++, FileZilla, WinSCP, etc.
- Some Windows Features such as .Net 3.5
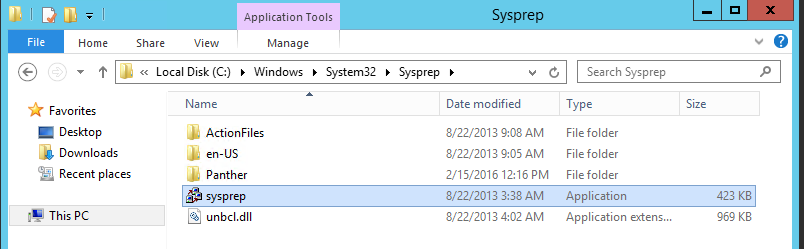
Once you have your updates, settings and apps where you want them on the VM, navigate to C:WindowsSystem32SysPrep and run SysPrep.exe
You’ll want to use the Out-of-Box Experience and be sure to check the box to Generalize. In the shutdown options, select Shutdown. The system will enter a generalized state much like when purchasing a PC from a retailer and shut down once completed so we can export the template.
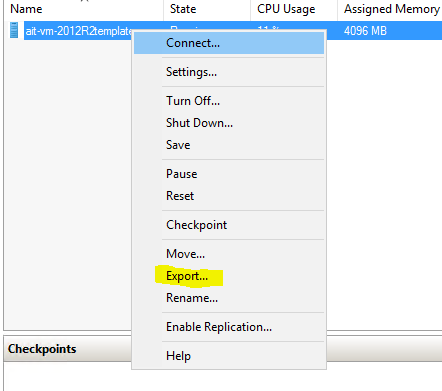
Once the VM is completely shut down, right click on it and select “Export”:
Select your export location and click Export.
Optionally, you can choose to simply copy and paste the template VHD and rename it each time you stand up a new VM. Choosing the export option allows for rapid cloning of the VM Configuration file, which may prove useful if you plan to set up numerous VMs with the same hardware specifications. The option of a full export is laid out below: 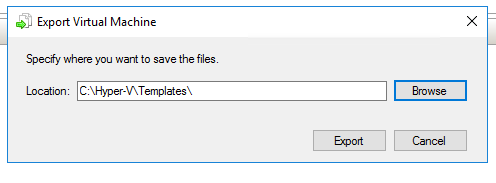
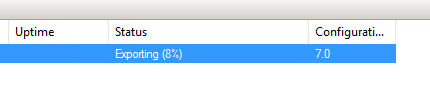 Hyper-V will now go through the process of copying the VM virtual hard drive and configuration to the destination you selected. Once the process is completed, you can move the exported folder to any other Hyper-V host running the same version as where you created the VM and import the image for use. You can leave the VM alone and turn it back on later to apply the most recent updates and repeat the sysprep process to keep an always up to date Hyper-V template. You can also now delete the VM you created (be sure to remove the virtual hard drive as well) as it’s no longer needed beyond use as a gold image or master image if you wish. Importing the template seems just as simple as exporting, but there some additional items that need changed after import. First we need to import the template into Hyper-V.
 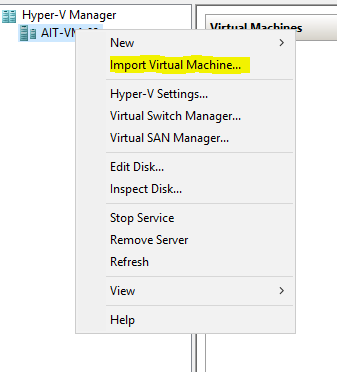 Select the folder you exported the template VM into.
 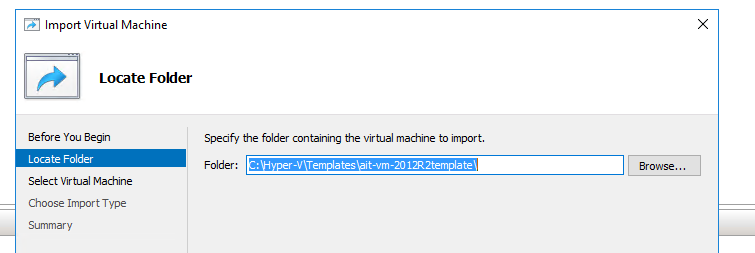 Select “Copy the virtual machine” to generate a new ID.
  Specify the location of the VM files after the copy and the location of the VHD.
 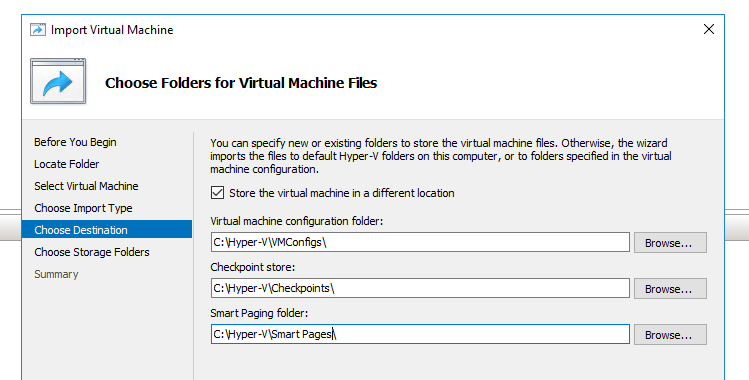 Once the import operation is completed, rename the VM to something that better suits the server or what the server name will be. Once this is completed, you’ll need to navigate to the folder you selected for the operation to copy the VHD to (commonly the default location of all VHD files on Hyper-V) and rename the VHD. During the import service Hyper-V makes (essentially) an exact replica of the template to include file names for disks. You’ll want to rename this copied disk to match the server name. If you attempt to use the template again and do not rename the disk, the operation will fail due to a file with the template disk name already existing.
  Don’t forget to edit the VM after renaming the disk and remap the VM disk to this new file name.
 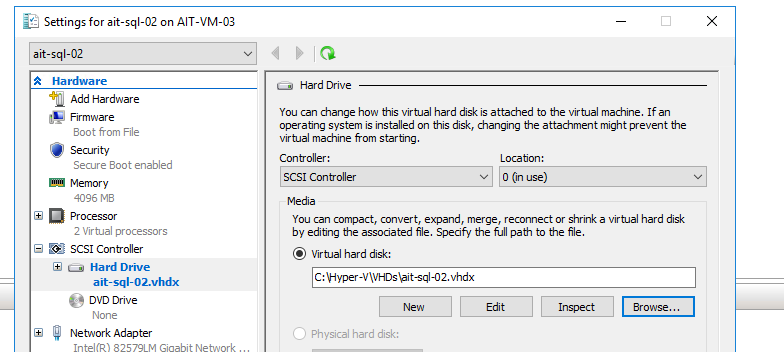 After that, it’s simply a matter of powering the VM on, going through the initial configuration, and you have a fully updated VM that’s been deployed in 5 minutes.
In a future post, we’ll cover automating this process through PowerShell.
Jeremy Sheehan is a Cloud Specialist at Agile IT, and runs many of our AgileAscend projects. To hear more of our tech team’s wisdom, check out our blog here, and to speak with us regarding Hyper-V (or anything else!) you can contact us here.