Office 365 Workstation Setup and Configuration Guide
Office 365 Workstation Setup and End User Workstation Configuration Guide office365workstationsetupandenduserworkstationconfiguration...

Office 365 Workstation Setup and End User Workstation Configuration Guide
This blog is an update of our Step-By-Step Guide to Manual Office 365 Setup for Workstations and covers the easiest, automated steps to using Autodiscover to both install and configure the Office 365 applications and the associated Office 365 subscriptions (licenses).
These instructions depend on Autodiscover which will be enabled coinciding with the initiation of the migration of mailboxes.
Before starting check with your network administrator to determine which license has been assigned to your new mailbox (e.g., E1, E3, Business Premium, Business Essentials, Email Only)
E5, E3 and Business Premium license holders confirm you will be installing Office 365 apps to your computer. Follow the instructions for “E3” not “E1”
E1, Business Essentials, Email Only license holders or those not installing Office 365 apps to your computer, follow the instructions for “E1” not “E3”
The objective is to setup your PC desktop for Office 365:
- Connect to the Office 365 web portal
- Remove Old Office Versions
- Run Microsoft Updates
- E3 - Install Office 365 Apps
- E1 - Install Desktop Update and Skype for Business
- Prompts and Processing Actions
- Office 365 Outlook Setup
- Troubleshooting
To set up your desktop for Office 365, follow these steps:
1. Verify you can connect to the Office 365 web portal
Sign into the Office 365 portal (portal.office365.com), using your email address and password, (credentials provided by your Network Administrator).
If you cannot login, please stop and seek assistance.
2. Remove Old Office Versions
- You currently have an older version of Microsoft Office already installed, you will first need to completely uninstall it before proceeding with your new install.
Open your Control Panel, Programs folder. Locate Microsoft Office and select to uninstall. A reboot will be required.
Caution: Installing Office 365 over the top of previous versions Office 365 apps will NOT update OneDrive for Business causing it fail. Uninstall Office before proceeding.
- Uninstall Stand-alone Office applications from your PC
Stand-alone Office Applications (including Volume License versions) –These applications usually must be removed before installing a new version of Office and then can be reinstalled.
Recognize that sometimes (2010 and earlier versions) the uninstall of these applications leaves remnants which prevent reinstall. Using the Microsoft provided uninstaller to uninstall all Office applications can be used to avoid this issue.
Microsoft uninstaller: https://support.office.com/en-us/article/Uninstall-Office-2013-Office-2016-or-Office-365-from-a-PC-9dd49b83-264a-477a-8fcc-2fdf5dbf61d8?ui=en-US&rs=en-US&ad=US
When planning to reinstall stand-alone applications (like MS Project, Visio) after the Office upgrade you will need the original install media and product code(s).
3. Run Microsoft Updates
Required for all Configurations: Run Microsoft Updates to install all available updates. A reboot may be required.
4. E3 - Install the new Office 365 apps to your PC:
- Sign into the Office 365 portal (portal.office365.com), using your email address and password, (credentials provided by your Network Administrator).
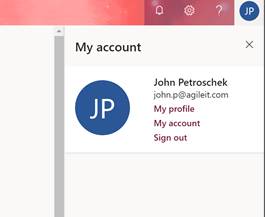
- Click on you account icon at the upper Right corner of the screen, then select My Account
- In the settings pane, locate and click on “My Installs”
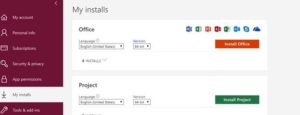
- You will be installing Office 365 ProPlus with the new 365 apps to your PC, you can do so now by clicking Install Office.
This will begin streaming the software to the computer. After this ‘Click to Run’ process begins, you will be able to launch the applications and have them ready for use, while the rest of the components are downloaded, updated and installed in the background. “Click to Run” can take several hours to fully complete.
You can read more on the Click to Run technology in the following Microsoft article: https://docs.microsoft.com/en-us/deployoffice/overview-of-the-office-customization-tool-for-click-to-run
NOTE: If an older version of Microsoft Office is already installed, you will first need to completely uninstall it before installing Office 365 Apps.
E1 - Install Desktop Update and Skype for Business
(Office 2007 is no longer a supported version of Office – It is recommended to upgrade to Office 2016 or newer. Skype for Business has been replaced by Microsoft Teams and is no longer available for download)
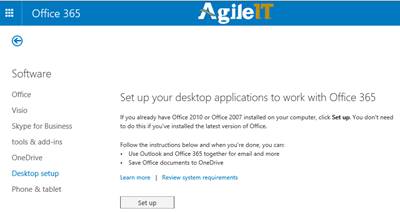
- If your version of Office is Office 2010 SP2 or later, it is ready to connect to Office 365 and you should skip this step for Desktop Setup. When using Office 2010 pre-SP2 the Desktop Setup configuration program must be run. You will need to follow the link on the left edge of the window to Desktop Setup. Then just click on the Set Up button and wait for the next prompt to start this wizard.
Prompts and Processing Actions
- If prompted, sign in using your Microsoft Online Services ID (your email address).
- The Office 365 desktop setup will check your system configuration. When the check completes without detecting any problems, you’ll be presented with options to configure your desktop applications and a link to learn more about the important updates Office 365 desktop setup will install. If a problem is detected, a message will appear. Refer to Microsoft Support and Recovery Assistant for Office 365 for information to resolve the issue.
- After you have selected the applications you want to configure, click Continue, review the service agreements, and then click I Accept to begin installing updates and configuring desktop applications. (Important: Some of the applications may have shaded checkboxes. This can occur if your account has not been provisioned to use this application with Office 365 or if your computer does not have the required applications already installed. Should this be an issue, consult your network administrator.)
After running Office 365 desktop setup, a shortcut to the Office 365 portal will be added to the Start menu on your desktop.When the installation and configuration have completed, you may have to restart your computer to finalize the installation and configuration processes.
- When configuring Office 365 with a preinstalled copy of Office already on a machine, you may see a warning during the configuration of Outlook that states some additional manual steps are required. In this case, start up the Outlook program and complete the wizard, which will use auto-detect to configure the profile, based on this user’s Active Direct login (the user account they are logged in under). Alternatively, based on the email address you supply to the setup wizard, there will be a link to Learn More in the Setup Wizard. This will take you to a list of help articles, which detail how to complete the manual steps for the Outlook setup.
Office 365 Outlook Setup
Note: After setting up Outlook please allow one or more hours for Outlook to fully synchronize with Office 365. You can recognize the process is complete when the status bar in Outlook displays “All folders up to date” for more than 3 minutes.
To add Office 365 to your Outlook desktop application, follow these steps.
Option (1) First time user, no existing mail profile
- To open Outlook:
- Windows 7 – on the Start menu, navigate to All Programs, point to Microsoft Office, and then click Microsoft Outlook.
- Windows 10 – Click the Windows key on our keyboard, type “Outlook” then hit Enter.
- Enter your email address and Office 365 password. In a few minutes your Office 365 mail account will open and populate data from your cloud mailbox.
Option (2) I have an existing mail profile (using Outlook previously) – You will create a new profile through Control Panel (pictorial is shown below)
- To open Outlook:
- Windows 7 – on the Start menu, point to Control Panel, and then click Mail.
- Windows 10 – Click the Windows key on our keyboard, type “Control Panel” then hit Enter.
-
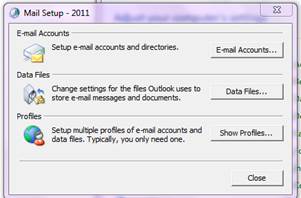
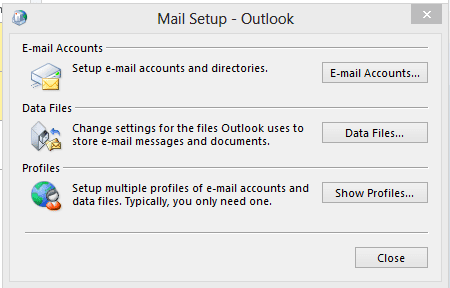
In the Mail Setup dialog box, select Show Profiles.
-
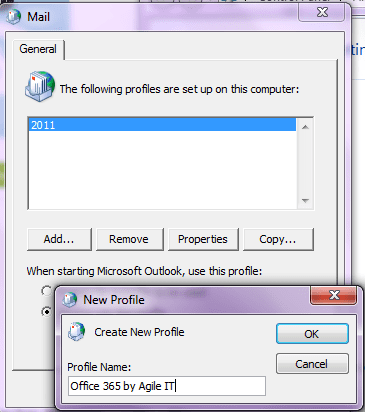
In the Mail dialog box, click Add.
-
In the New Profile dialog box, type a new profile name (e.g., Office 365), and then select OK.
-
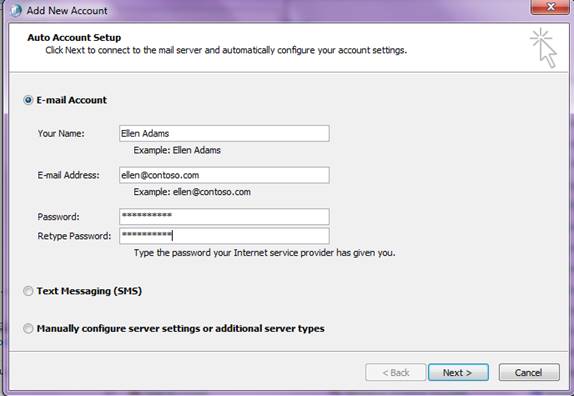
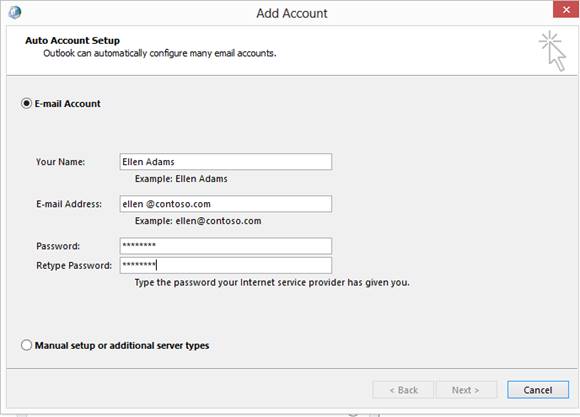
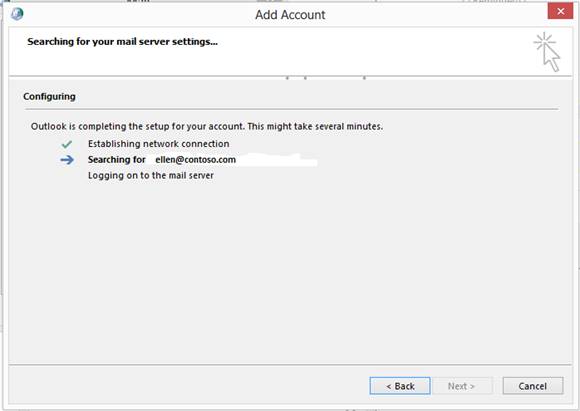
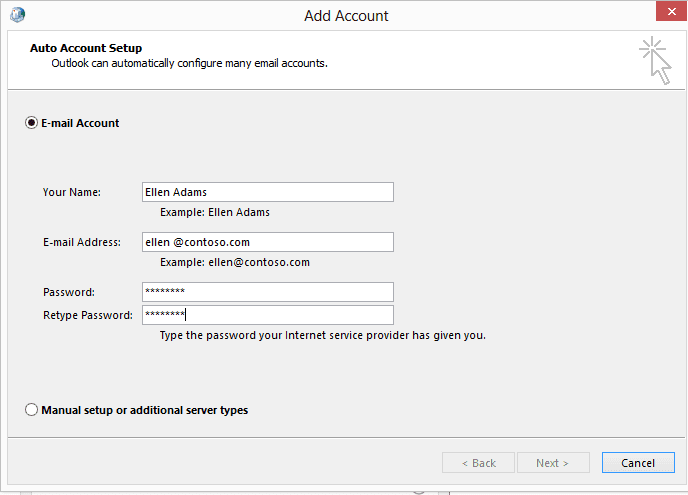
In the Add New Account dialog box, type your name, type your Office 365 email address, type your Office 365 password, and then select Next.
-
If prompted for credentials, enter your email address and password for Office 365. Optionally, select Remember Password.
-
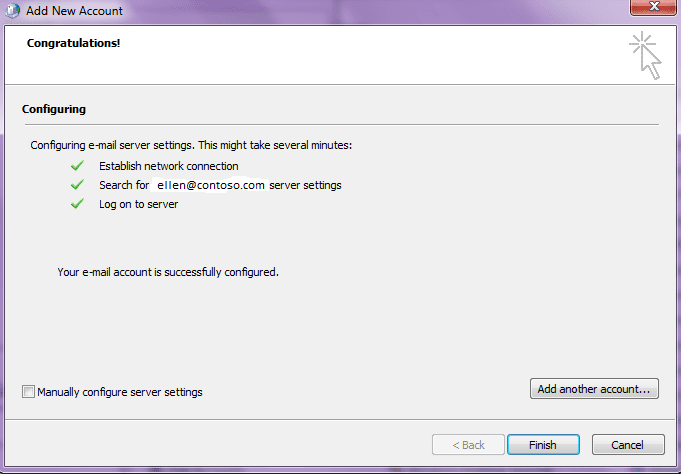
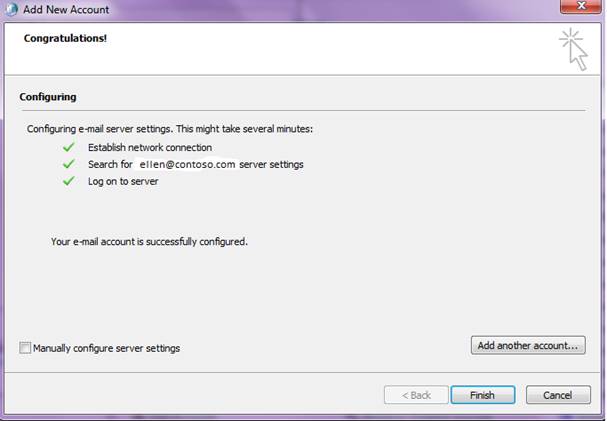
At the Add New Account - Congratulations dialog box, select Finish.
-
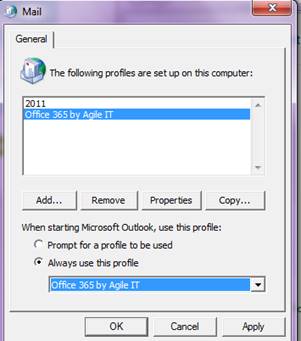
You should be returned to the Mail dialog box, set “Always use this profile” to match your newly created mail profile, then select OK.
-
Now, start Outlook from your Start Menu. The new profile will open and begin to synchronize with Office 365 online mailbox. Note: This operation can take an hour or more per GB of mailbox size.
Windows 7 Office 365 Workstation Setup Pictorial Steps

Windows 8 Office 365 Workstation Setup Pictorial Steps


Troubleshooting
After installation of the new Office if you are having a problem with Office ‘freezing’ (top 2 solutions):
- Disable “hardware graphics acceleration” (Under options from any Office program) can address Office ‘freezing’, if occurring.
- Change default printer (Some printer drivers may need to be updated)
E3 – OneDrive for Business not installed after installing Office 2016
OneDrive for Business installs as part of Office 2016. The Office 2016 version of OneDrive for Business is not compatible with earlier versions. Earlier versions must be uninstalled (performed as part of Office uninstall).
Sometimes when installing Office 2016, OneDrive for Business does not install.
- You may have Microsoft Office 365 Personal or Office 365 Home installed on your computer.
- You performed upgrade from Microsoft Office 2013 to Office 2016.
Microsoft has provided an easy fix to extract and install only the 2016 version of the OneDrive for Business sync application: : https://support.microsoft.com/en-us/kb/3098502
- E3 – OneDrive for Business not working or starts with error
- E3 – Stand-alone Office Applications (including Volume License versions) block complete installation of Office 2016
These applications usually must be removed before installing your new Office and then can be reinstalled. Sometimes (2010 and earlier versions) the uninstall of these applications leaves remnants which prevent reinstall. Using the Microsoft provided uninstaller will completely remove all Office applications.
When planning to reinstall stand-alone applications (like MS Project, Visio) after the Office upgrade you will need the original install media and product code(s).
- For all other issues please visit the Microsoft Support and Recovery Assistance for Office 365.